
Building a Modern Task Manager
Integrating Zoho CRM with React Using RunAlloy
A step-by-step tutorial for making a basic task manager that pulls Zoho CRM Tasks into a React app using RunAlloy’s unified API platform. Think less plumbing, more productivity — with a little flair.
The Challenge (and why it’s actually fun)
Integrating with third-party APIs like Zoho CRM can feel like assembling IKEA furniture without the instructions: OAuth screws, token washers, and sometimes a mysterious piece labelled “rate limit.” But once you have the right pattern, it becomes repeatable and even enjoyable.
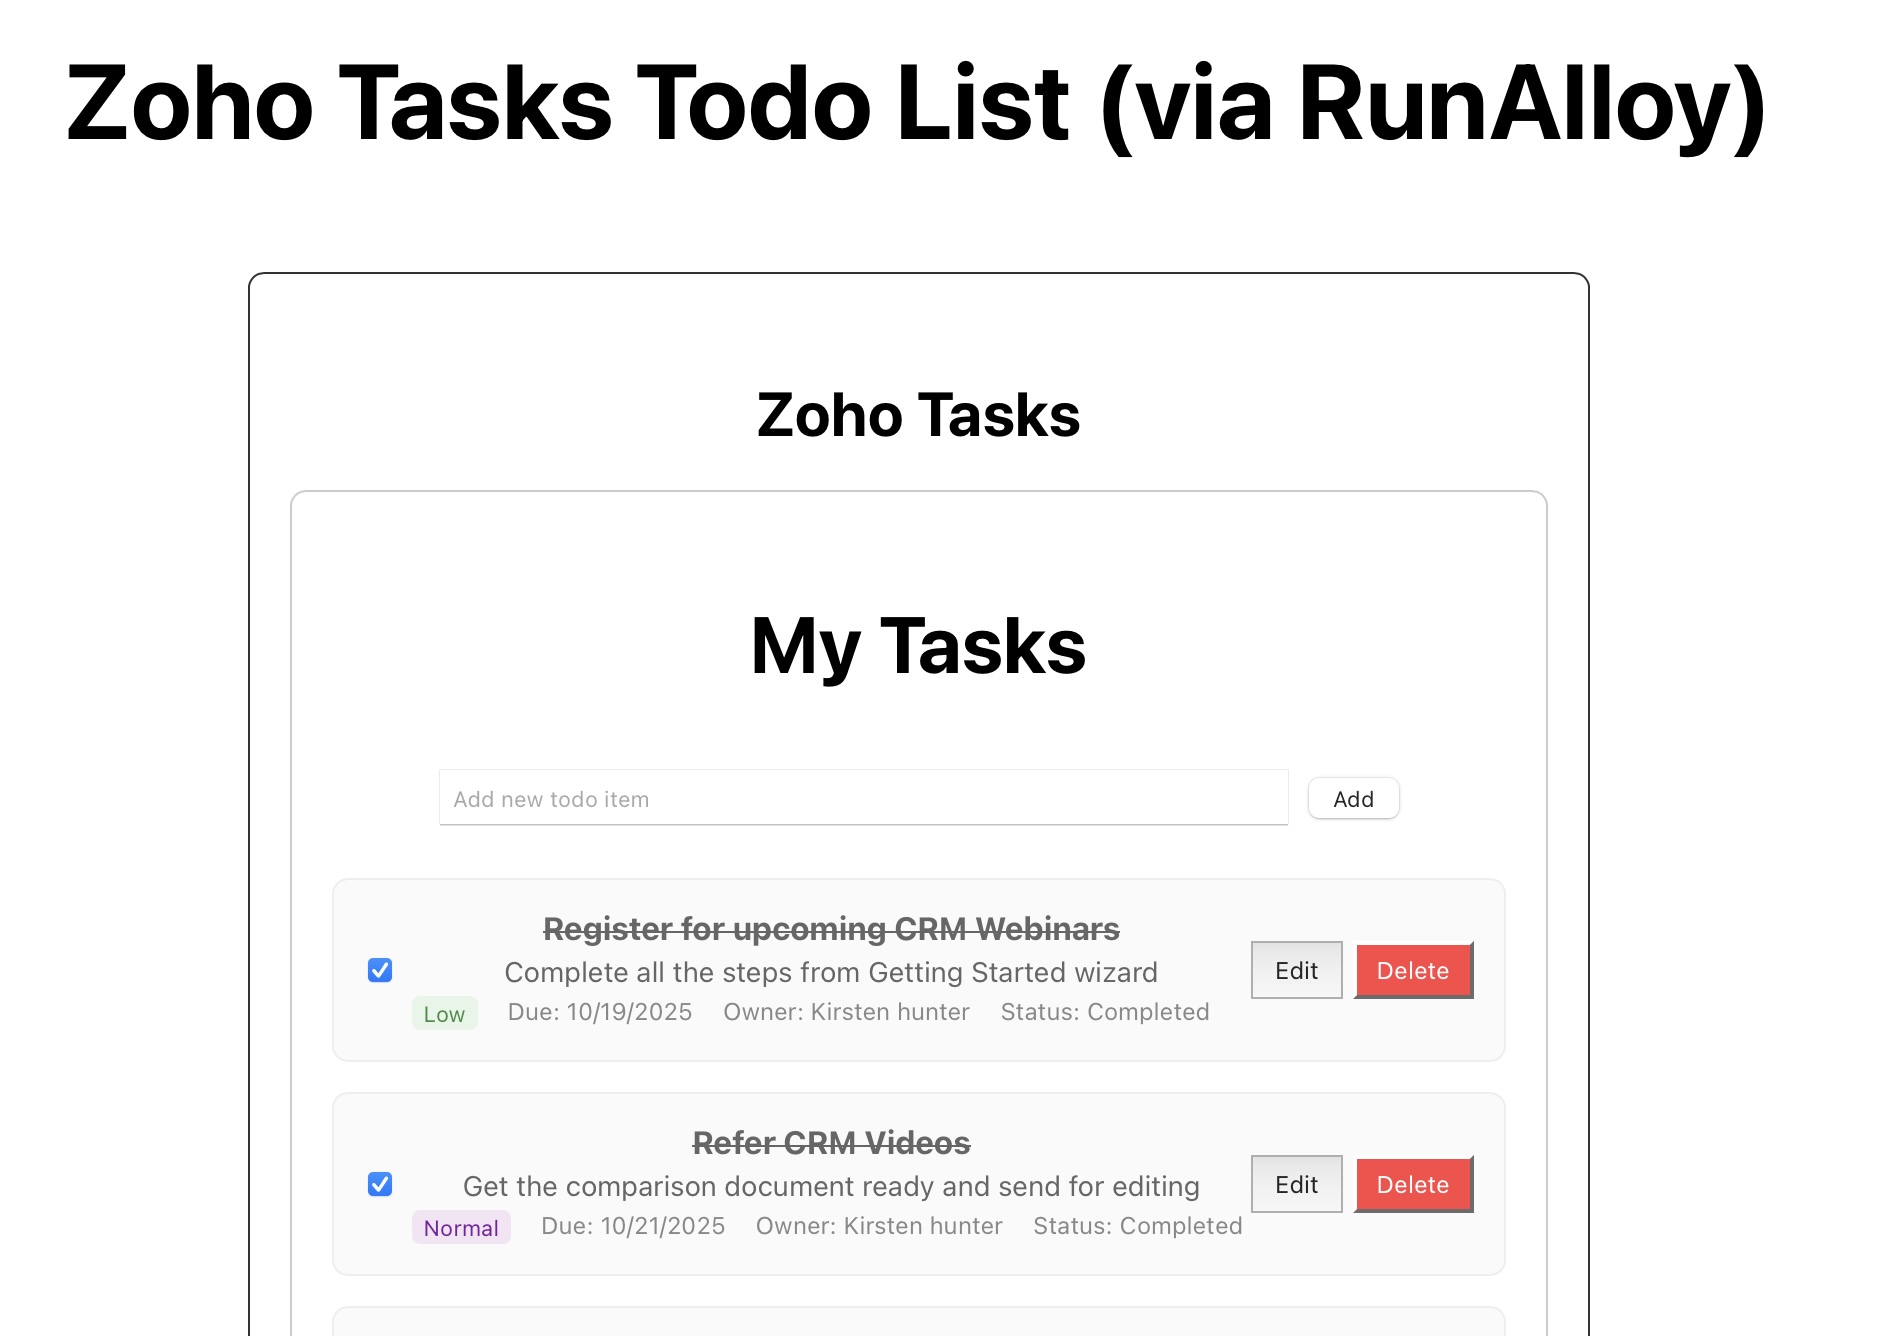
In this tutorial we’ll build a React-based task manager that uses Zoho CRM’s Tasks module as the backend, routed through RunAlloy’s connector platform. The result is a simple, single-list task UI that syncs with Zoho so your tasks live where your team already works.
Why This Architecture? (Short answer: less headache)
We’re not connecting directly to Zoho. Instead, RunAlloy sits in the middle as our friendly translator and bouncer:
- ✅ Centralized Authentication: RunAlloy handles OAuth credentials and token refresh for you
- ✅ Connected API: One consistent interface across multiple connectors
- ✅ Built-in Rate Limiting: No custom throttle logic
- ✅ Cleaner Errors: Standardized responses make debugging less painful
- ✅ Monitoring Dashboard: Track usage and spot issues quickly
All that means you can build features, not plumbing.
The Stack (the cast of characters)
- Frontend: React — a simple single-task-list UI
- Backend: Netlify Functions for tiny serverless endpoints which interact with RunAlloy
- Integration Layer: RunAlloy for Zoho CRM connectivity
- Task Storage: Zoho CRM Tasks module to interact with your tasks on Zoho
- CLI Tool: HTTPie for quick API testing (because typing beats clicking sometimes)
Architecture Overview (how the parts chat)
Frontend (React) – Single Task List
↓
Netlify Functions (zoho-tasks.cjs)
↓
RunAlloy Helper (runalloy-helper.cjs)
↓
RunAlloy API
↓
Zoho CRM Tasks Module
Prerequisites (what you’ll need)
- Node.js (tested with v24.5)
- HTTPie CLI for API interactions
- A Netlify account (the deploy step will make this happen)
- A Zoho account with access to CRM
- A RunAlloy API token (see the image)

If you have these ready, we’re off to the races.
PART 1: Setting Up HTTPie for API Management
Managing headers for every request gets old. HTTPie sessions let you store headers and reuse them. Clean, fast, and repeatable.
Install HTTPie
Follow the official guide at https://httpie.io/cli. On macOS:
brew install httpieConfigure HTTPie Sessions
HTTPie sessions save headers so you don’t have to type them every time.
Step 1: Create the HTTPie config directory:
mkdir -p ~/.config/httpieCreate ~/.config/httpie/config.json:
{
    "default_options": [
        "--session-read-only=~/.config/httpie/default_headers_session.json"
    ]
}
Step 2: Create the session file with your RunAlloy credentials:
{
    "__meta__": {
        "about": "HTTPie session file",
        "help": "https://httpie.io/docs#sessions",
        "httpie": "3.2.4"
    },
    "auth": {
        "password": null,
        "type": null,
        "username": null
    },
    "cookies": [],
    "headers": [
        {
            "name": "x-api-version",
            "value": "2025-06"
        },
        {
            "name": "Authorization",
            "value": "Bearer YOUR_RUNALLOY_API_KEY"
        }
    ]
}
Step 3: Give it a spin:
https https://production.runalloy.com/connectorsIf your setup is correct, you’ll get a list of connectors — including zohoCRM. High five! ✋
PART 2: Deploying the App (do this before creating credentials so the OAuth redirect works)
Quick Deploy with Netlify (one-click happiness)
Use Netlify’s one-click deploy to get started quickly:

This will:
- Fork the repo to your GitHub account
- Create a Netlify app
- Set up automatic deploys
Pick a unique name (like zoho-yourname). You’ll get a URL like https://zoho-yourname.netlify.app.
PART 3: Setting Up a RunAlloy User
With Netlify deployed and HTTPie configured, let’s set up the RunAlloy bits.
Environment variables
Create a .env file (don’t commit secrets, so make sure that .env shows up in .gitignore):
# RunAlloy API Configuration
RUNALLOY_API_KEY=your_api_key_here
RUNALLOY_API_URL=https://production.runalloy.com
Local development
Clone your newly created repository, set up your environment variables, install, and run locally:
git clone https://github.com/YOUR_USERNAME/YOUR_REPO_NAME
cd YOUR_REPO_NAME
npm install
npm install -g netlify-cli
netlify link
You can access your development server at http://localhost:3000
Create a RunAlloy user
Every integration runs in the context of a RunAlloy user.
https https://production.runalloy.com/users \
    username="your-email@example.com" \
    fullName="Your Full Name"
Note that httpie will process the above as a POST because of the formatting of the parameters with ‘=’.
This returns a user ID (for example: 68f1e561ba205b5a3bf234c8). Update your HTTPie session file so the x-alloy-userid header uses this ID. Lost your userId?
If you forget your userId string, list the RunAlloy users to find it by matching the email with the username:
https https://production.runalloy.com/usersCreate a Zoho CRM credential
Use your deployed Netlify Project URL as the redirect URI for this command — e.g.:https://YOUR_APP_NAME.netlify.app/.netlify/functions/zoho-auth
Then run:
https https://production.runalloy.com/connectors/zohoCRM/credentials \
    userId=YOUR_USER_ID \
    authenticationType=oauth2 \
    redirectUri=https://YOUR_APP_NAME.netlify.app/.netlify/functions/zoho-auth \
    data:='{"region":"com"}'
This returns an OAuth URL. Open it, sign in to Zoho, and grant permissions. If you get a 404 or server error, make sure that you’ve done the Netlify deploy step above.
After that, list credentials to get the credentialId:
https https://production.runalloy.com/connectors/zohoCRM/credentialsYou will want the credential for ‘zohoCRM-oauth2’ that has your user’s FullName in the name of the credential for the next step.
Configuration notes
In netlify/functions/zoho-tasks.cjs you’ll set the following variables.
Note that in a production environment the user and credentials would be created and managed dynamically, but some of the credentials I created don’t work correctly so for this demo I have hard-coded the user and credential values.
globalState.set("userId", "YOUR_USER_ID");
globalState.set("credentialId", "YOUR_CREDENTIAL_ID");
PART 4: Testing
Local testing
Start Netlify Dev:
netlify devOpen http://localhost:8888 in your browser and try:
- Viewing tasks from Zoho
- Creating a new task
- Updating a task (status, priority, due date)
- Deleting a task
Everything should sync with Zoho CRM. If it doesn’t, breathe, then check the troubleshooting tips below.
Production deploy
When ready:
netlify deploy --prodPART 5: Understanding the Code Architecture
Frontend (React):
- App.js — main container handling UI and auth prompts
- BoardComponent.js — simplified task display
- TodoList.js — rich task list with priority, dates, etc.
- AppContext.js — shared app state
Backend (Netlify Functions):
- zoho-tasks.cjs — CRUD endpoints for tasks
- zoho-auth.cjs — OAuth callback handler
- runalloy-helper.cjs — thin wrapper around RunAlloy API actions for the zohoCRM connector
Key features:
- Single list UI — simpler and easier to use
- Rich task display — priority badges, due dates, owners
- Completion toggle — click a checkbox and it updates in Zoho
- Loading and error states — friendly messages so users aren’t confused
- Proper error handling — human-friendly messages with actionable hints
PART 6: Zoho CRM Field Mappings
We map Zoho CRM task fields into UI-friendly fields:
- Subject → Task title
- Status → Not Started, In Progress, Completed
- Priority → High, Normal, Low
- Description → Task notes/details
- Due_Date → Due date
- Owner → Assignee
- Created_Time → When the task was created
- Modified_Time → Last updated timestamp
Benefits — short and sweet
For Developers:
- No direct OAuth plumbing with Zoho
- One API pattern across connectors
- Faster to prototype and iterate
For Users:
- A clean single-list interface
- Rich task info at glance
- Near real-time sync with Zoho CRM
- Mobile-friendly, responsive layout
Troubleshooting
“Authorization token required”
- Check
RUNALLOY_API_KEYin your environment variables - Ensure the API key is valid in the RunAlloy dashboard
“Credential ID required”
- Make sure your Zoho connector is configured and active in RunAlloy
- Verify the
credentialIdexists and hasn’t expired
“Failed to fetch tasks”
- Confirm the Zoho connector has the right permissions for Tasks
- Check RunAlloy dashboard logs for backend errors
- Try the HTTPie test calls above to isolate where the failure happens
“Credential not found”
- This happens when the credential is not created correctly, for instance if the region is not set to ‘com’. To resolve this, do the credential creation step again and try the app with the new credential.
What’s Next?
- Filters and sorting
- Tags or categories for tasks
- Due-date reminders or push notifications
- Sync other Zoho modules (Contacts, Deals)
- Team collaboration features (assignment notes, comments)
Conclusion (you did it!)
Using React, Netlify Functions, and RunAlloy, you can build a modern, maintainable task manager that talks to Zoho without forcing you into an OAuth spiral. This pattern is reusable across RunAlloy’s 200+ connectors — build once, reuse often, and ship faster.
The HTTPie workflow gives you a professional, scriptable way to test and iterate. Now go make something awesome — and maybe reward yourself with a coffee when it works. ☕️✨
Resources